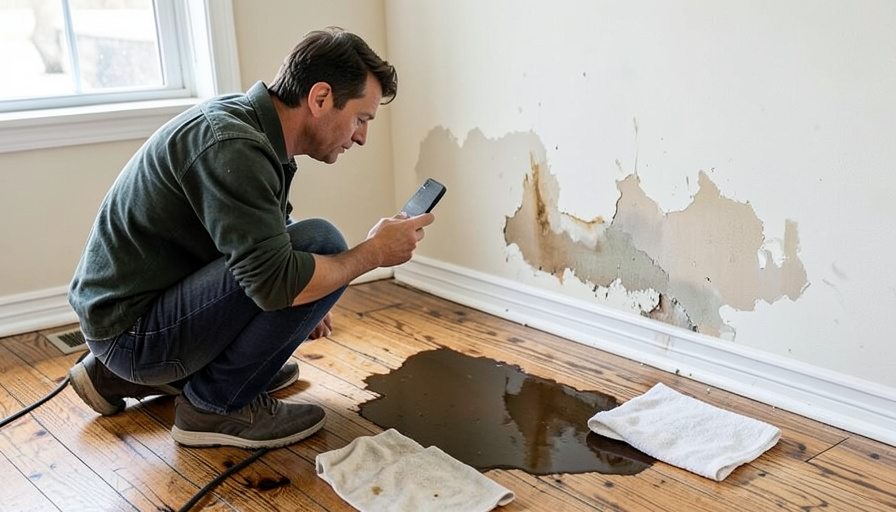
A pipe lets go, or the washing machine floods, and your first instinct is exactly the wrong one for your wallet: grab towels, haul out the soaked rug, start drying before it gets worse. Cleaning up fast is right, but doing it before you document is a mistake that can cost you at claim time, because once the evidence is gone, the adjuster only has your word for how bad it was. A few minutes of photos first protects the payout.
The trick is to document thoroughly and quickly, then mitigate. Here are nine photos to capture right after a leak, before you clean up or throw anything away, so your insurance claim rests on evidence instead of memory.
At a glance
Before you dry, remove, or discard anything after a leak, photograph the whole scene and the damage in detail, with the date on. Get wide shots of each affected room, the source of the leak, close-ups of every damaged surface, the high-water line, ceiling and wall damage, the floors and subfloor, and your damaged belongings with their model and serial numbers. Keep the failed part and the ruined items until your adjuster has seen them or approves disposal. Do take steps to stop further damage, since your policy likely requires it, but document first. Then report the claim promptly and keep every receipt.
Table of Contents
1. Wide shots of every affected room
Start broad. Take a clear, wide photo of each room the water touched, from a couple of angles, before you move anything. These establish the overall scene and the scale of the damage, which is the context an adjuster needs. Do them first, while everything is still where the water left it, because once you start pulling up rugs and moving furniture, you can never recreate the original state. Make sure your phone’s date is on so the shots are stamped.
2. The source and cause of the leak
Photograph where the water came from: the burst pipe, the overflowing appliance, the stain spreading from a ceiling, the spot under a window. The cause matters because coverage often depends on it, sudden accidental damage is treated differently from slow, long-term seepage. A clear photo of the source, in place, supports your account of what happened and when. Capture it before you touch or shut off anything you can safely leave for the moment.
3. Close-ups of each damaged surface
After the wide shots, move in. Take a close, well-lit photo of every damaged surface, soaked drywall, warped trim, ruined cabinetry, one clear image per area. Detail shots prove the extent of the harm that a wide photo only hints at. Get near enough that the damage is unmistakable, and include enough surroundings to show where in the room it is. The more specific your close-ups, the harder it is for anyone to minimize the loss later.
4. The high-water line
Water leaves a mark, and that mark is evidence. Photograph how high the water rose on the walls or furniture, the wet line, the staining, the swelling, because the height tells the story of severity. It also helps determine what is salvageable and what is not, since materials below the line are usually a loss. A clear shot of the water line, ideally with something for scale, quantifies the flood in a way words cannot.
5. Ceiling and wall damage
Look up and around for the signs water leaves in structure: stained or sagging ceilings, bubbling or peeling paint, soft or bulging drywall. These indicate water has gotten into places you cannot see and often mean more repair than the surface suggests. Photograph every stain and sag, because they support the scope of the work needed. Sagging especially is worth capturing, since it can signal damage serious enough to need more than cosmetic repair.
6. Floors, baseboards, and the subfloor
Floors take the worst of a leak. Photograph warped, lifting, or discolored flooring, swollen baseboards, and, where you can safely see it, the subfloor beneath. Damage that continues under the surface is a major part of many claims and easy to overlook if you only shoot the top. If a board has already lifted, capture what is underneath. Documenting the floors and subfloor prevents a settlement that only pays for what was visible at a glance.
7. Damaged belongings with model and serial numbers
Your contents matter as much as the building. Photograph damaged furniture, electronics, appliances, and other belongings, and get a separate shot of each item’s make, model, and serial number where it exists. Those identifiers let the insurer value the item properly instead of guessing. Do not throw anything out yet, even obviously ruined items, because the adjuster may need to see them. A photographed serial number turns “a damaged TV” into a specific, provable loss.

8. Early signs of mold or lingering moisture
Water damage does not end when the water stops. Photograph any early spots of mold, musty discoloration, or visibly lingering dampness, since these show the damage is active and support the urgency of proper drying and repair. They also document a condition that can worsen, which matters if the claim takes time. Capturing the first signs of mold protects you if it develops further, showing it began with this event.
9. The failed part before you replace it
If a specific component failed, the burst supply hose, the cracked valve, the leaking appliance part, photograph it closely, and keep the actual part. It is physical evidence of the cause, and an adjuster or the insurer’s expert may want to examine it. Do not let a plumber haul away the failed piece before you have both a photo and the part itself set aside. That small item can be the proof that a sudden failure, not neglect, caused the loss.
How to use these photos and file well
Once you have documented everything, act on the rest quickly. Report the claim to your insurer promptly, and take reasonable steps to prevent further damage, stopping the water, starting to dry out, since most policies require you to mitigate, and keep every receipt for emergency work. Critically, do not throw away damaged items or the failed part until your adjuster has seen them or told you it is fine to dispose of them, and keep your original, timestamped photos rather than screenshots. Resources like the Insurance Information Institute explain the general claims process, but your own policy and adjuster set the specifics. For a related home risk worth handling carefully, see our guide on spotting mold remediation red flags.
This article is general information, not insurance, legal, or financial advice. Coverage, documentation requirements, and mitigation duties vary by policy and insurer, so read your policy and follow your adjuster’s instructions, and contact your insurer promptly after any loss.
Frequently asked questions
Why should I photograph water damage before cleaning up?
Because once you dry, remove, or discard things, the evidence of how bad the damage was is gone, and the adjuster only has your description. Timestamped photos taken before cleanup prove the extent of the loss and protect your payout. Document thoroughly first, then mitigate to prevent further damage.
Should I keep damaged items for the insurance adjuster?
Yes, until the adjuster has seen them or approves disposal. Ruined belongings and especially the failed part, like a burst hose or cracked valve, are evidence the insurer may want to inspect. Photograph everything, set the key items aside, and confirm with your adjuster before throwing anything away.
Do I have to stop the damage or can I wait for the insurer?
You should act to prevent further damage, since most policies require reasonable mitigation, like stopping the water and starting to dry out. The order matters: document with photos first, then mitigate. Keep receipts for any emergency work, as that cost is often reimbursable under the claim.
What details make a water damage photo useful for a claim?
A timestamp, good lighting, and both wide and close shots. Capture the source, the high-water line, each damaged surface, the floors and subfloor, and belongings with their model and serial numbers. Specific, dated, well-lit photos are far harder to dispute than vague ones, and they let the insurer value the loss accurately.
Does it matter what caused the leak?
Often, yes. Coverage can hinge on whether the damage was sudden and accidental or slow and long-term, so a clear photo of the source and the failed part supports your account. Keeping the failed component as evidence can be the proof that a sudden failure, rather than neglect, caused the loss.
The bottom line
After a leak, the money-saving move is to document before you clean. Take wide shots and close-ups, capture the source, the water line, the ceilings, floors, and subfloor, and your belongings with their serial numbers, and keep the ruined items and failed part until your adjuster signs off. Then mitigate quickly and report the claim. A few minutes of photos turns your claim into evidence instead of a story. For more on protecting and maintaining your home, browse The Other Stream’s Home Improve section.
Related Posts